Painting in Changes
Using Adobe Photoshop Elements (and nothing more). Revised 7th July 2003
Copyright UK 2003 Matthew Page. Please request written permission before reproducing this information
Matt Page, info@photon.me.uk
Outline
This document describes how to ‘paint-in’ changes into an image using layers and layer-masks. You can paint in sharpening to selectively sharpen one area (like eyes and eyebrows), or you can make a drastic colour change and apply it to one area.
Alternatively, you can create a blurred and desaturated version of the image that you can paint in around the background.
Preparation
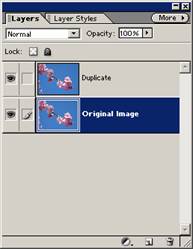
Start with a sample image - maybe a portrait. First off, double click the “Background layer” on the Layers palette and rename it “Original Image”.
Now, copy the image (you can click and drag the “Original Image” layer down to the bottom of the layers palette, to the icon on the left of the dustbin; or you can right click the layer and select “Duplicate”.)
Make the change
Highlight the top layer (the copy), and do some serious function to it. You may want to click, “Filter”, “Sharpen”, “Unsharp mask”, and use 200%, radius 2, threshold 2.
(You may want to try some other filter too to make it obvious.)
Ouch! The result should be way too much… but wait…
Create the mask
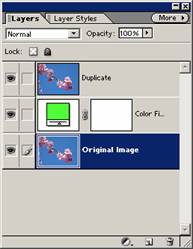
Select the “Original Image” layer on the layers palette. Now click the menu “Layer”, “New Fill Layer…” and select “Solid Color…”
On the “New Layer” dialog, make sure “Group with previous layer” is unchecked, and that Mode is “Normal”, and Opacity is 100%. Click OK.
Now select a nice bright colour, such as red or orange. You will make use of this colour later in examining the mask. Click OK.
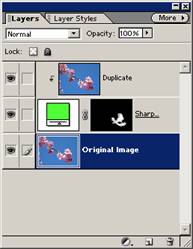
You can now rename the “Color Fill 1” layer to “Sharpening Mask”, for instance.
Notice that the layer has two little previews with a chain between them. The left preview is the colour (which you can double click to change), while the right one is a white mask.
Group the sharpened layer
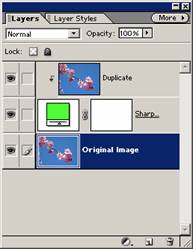
Now select the top layer that has the image, and select the menu “Layer”, “Group with Previous” (or you can press Ctrl-G). The layer will shift to the right in the layers palette and have an arrow pointing down to the colour fill mask you just created.
Hide the changes
When you created the mask it was pure white - meaning reveal everything. Here’s how you can mask out the whole of the change…
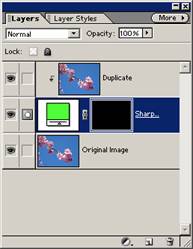
Hold the ALT key down and select the right hand preview window on the “Sharpening Mask” layer. The main window should show white.
Click Ctrl-A to select the whole area (or use “Select” and “All” from the menu). Press the “D” key to select default colours, and now press the Delete key (or click “Edit” and “Clear”). Now the screen should show all black. This means: apply nothing.
Hold ALT and click on the mask again, and you should see the image appear as it originally was.
Painting in the change
Now the fun part…
Select the brush tool, soft outline, with an opacity of around 50 to 80%. Select white as the foreground colour. Select the “Sharpening Mask” layer, and start painting!
As you paint in white, the effect that is grouped above the mask layer will become visible. In addition, the mask preview in the layers palette will start having little holes appearing. Paint more to reveal the change more.
Paint in black to undo the effect.
Remember:
white = full effect
black = no effect
grey = partial effect
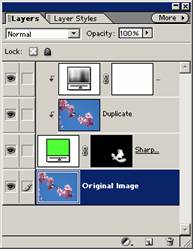
Showing the masked area
So you can see what you have masked, and see how well you’ve painted it, click the visibility toggle of the “Duplicate” layer that’s grouped above the mask layer.
Amazing! The mask appears in the colour you picked. You can select the mask layer and paint a bit more (in black/white/grey) to improve the mask.
Click the “Duplicate” layer visibility again to see what changes have been made.

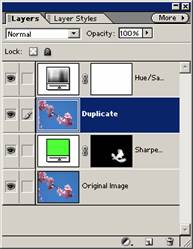
Stacking the effects
Don’t forget you can stack effects on top of the “Sharpening Mask” layer. Select the “Duplicate” layer, and insert a new adjustment mask (such as Hue/Saturation).
Make sure you check “Group with Previous Layer”!
Now you can tweak the effects, which only show through the mask.
If you need to temporarily disable the mask, select the “Duplicate” layer, and click the menu “Layer”, “Ungroup” (Ctrl-Shift-G). You can then see the changes as a whole, and then regroup the image and it’s effects with the mask when you are done (Ctrl-G on each layer). Simple!
Further fun with the mask
You can vary the opacity of the mask layer to globally adjust the amount of effect that layer holds.
Also, don’t forget you can apply effects to the mask layer alone! Hold the ALT key and select the mask - you will see a black/white/grey image of the mask.
You can now perform filter functions - such as blur, brightness/contrast, levels - all of which affect the mask only.
If you need to copy the mask - select all (Ctrl-A), and copy (Ctrl-C). You can now paste this as a layer on its own (which you can hide), or select the mask of another layer (again with Alt-click), and paste in the copied mask.
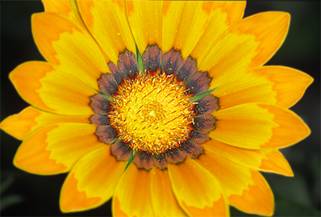
Sample Image
|
Before |
|
|
|
After |
|
|
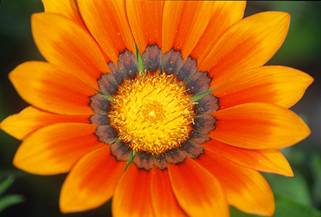
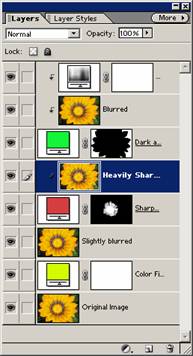
The top three layers (green mask layer) provide a darkened and blurred background.
The next two layers (red mask layer) provides heavily sharpened version for painting in the flower centre.
The next layer down is a slightly blurred version of the original image.
Some of the selections were done with the magic wand and the mask adjusted by selecting the mask, and clicking Shift-Del to either turn black or white the selected area of the mask.